Earlier this year one of our inspectors was on site with a client to discuss a fairly simple project, but the visit identified a problem with the plan to shingle the roof. The roof, a simple single-plane sloping structure (“barn dormer” in building lingo) had a slope of about two feet over eight feet, (a 3:12 pitch) and the builder wanted to use shingles.
Veteran contractors may already know the problem our inspector identified: the roof wasn’t steep enough for a simple shingle installation.
The National Building Code of Canada stipulates that shingles can be used without much in the way of specialized installation for any roof with a slope of 1 in 3 (a 4:12 pitch for builders). Shingles can be used on roofs as shallow as 1 in 6 (a 2:12 pitch), but with special requirements, most notably that the installation must be such that there are three layers of shingle over the entire roof, not two as well as special applications of cement and tar.
Ultimately, the builder chose a metal roof, which is Code-compliant for a 1:4 slope, and for the builder, a simpler and cheaper alternative.
Here’s the thing with shingles: the shallower the slope, the more susceptible they are to issues of wind-borne rain driving up-slope.
Of course, shingle roofs require what we call “eaves protection,” (see post here: https://snbsc-planning.com/roofing-tip-protect-those-eaves/) and what builder refer to an “ice and water shield” when they transition over a heated space to an unheated eave. This helps protect the roof from ice-dams.
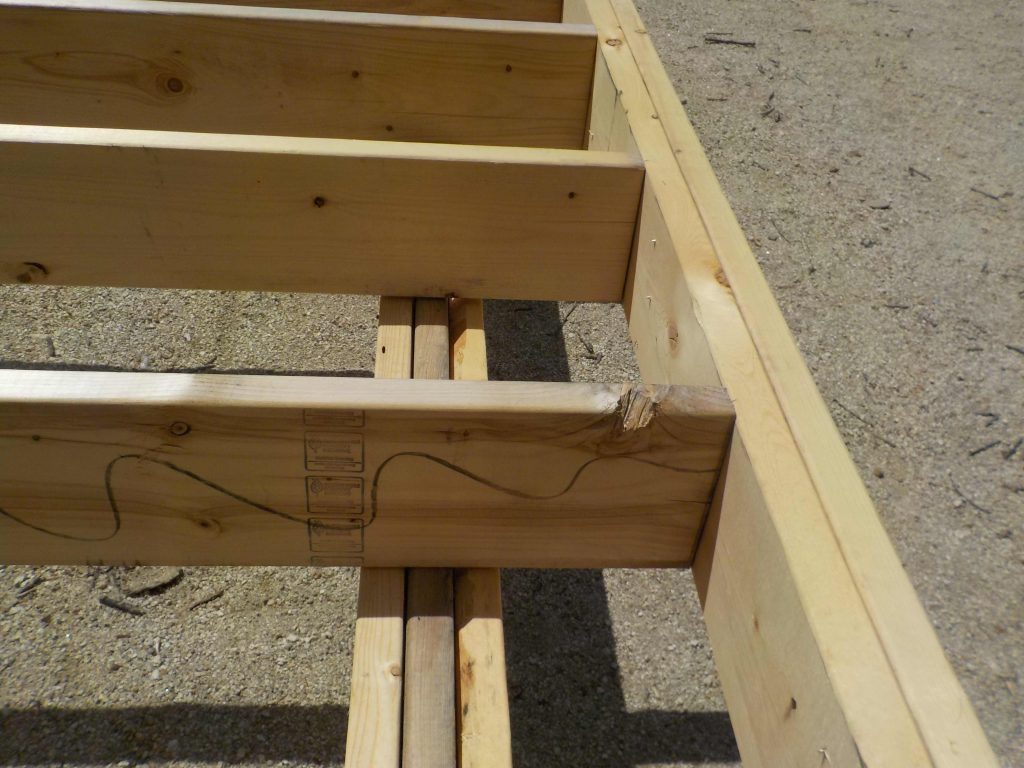
Every now and then, we field a question from a builder that requires a little more digging before we can give an answer. Earlier this year, one of our inspectors fielded such a question about a common practice: building a cantilever on a deck, such as in the image shown here.
This partly-built deck has a cantilever: the edge of the deck goes beyond the final support. It looks OK, but is it?
The question itself was simple enough: “how far can I extend that cantilever?”
For those that aren’t in the building business, a cantilever is simply a building element that extends beyond its support, and when you think about it, cantilevers are common to just about every building: most roof systems extend beyond the support of a house wall, for example.
For a number of reasons, folks building decks want to extend the deck beyond the support beam. One of those reasons is that making a small extension does much to hide the same beam. But how far can a builder go?
Here’s the interesting thing: the National Building Code of Canada is surprisingly silent on cantilevers when it comes to decks. There is some guide for cantilevered construction supporting roof loads (max 600 mm/24” cantilever when using 2x10s, max 400 mm/16” when using 2x8s), but nothing about cantilevers when there aren’t roof loads.
So our inspector dug deeper and found documents from the Canadian Wood Council. This organization’s work actually feeds into the National Building Code span tables.
The answer?
The exact same.
A Wood Council document (here) gives some very high-end detail about decks, but the take-away as far as cantilevers go is almost exactly the same: 400mm/16” for 2x6 or 2x8 lumber, and 600mm/24” for 2x10 or 2x12 lumber.
This question highlights how our office works: a question might stump us at the outset, but we’ll do our utmost to give a solid answer at the end. We serve the unincorporated areas of Charlotte and southern York counties, as well as the municipalities of Harvey, McAdam, St. George and Saint Andrews. Our inspectors can be reached by calling 466-7369.
The holes in this load-bearing stud are a violation of building code.
This image shows one of the things our building inspectors are trained to spot. This pipe is a vent pipe – known to some as a “stink pipe,” in a renovation.
And it also created a violation of the National Building Code in the process.
Why?
Buildings these days are complicated things, and now more than ever, sub-contractors are faced with challenges about how to route things like water pipes, waste pipes, electrical wiring, communications and alarm wiring and the like through joists and walls.
Here’s the general rule on how to drill holes through studs or joists: Never drill a hole more than 1/4 of the thickness of the load-bearing member, and never drill a hole so that its edge is closer to 50 mm of the edge of that section of wood.
Load-bearing studs have more strict regulations, according to clause 9.23.5.3 of our inspector’s favourite bedtime storybook, the National Building Code of Canada, 2010 edition:
Wall studs shall not be notched, drilled or otherwise damaged so that the undamaged portion of the stud is less than two-thirds the depth of the stud if the stud is loadbearing or 40 mm if the stud is non-loadbearing, unless the weakened studs are suitably reinforced.
That’s what happened here: the pipe cuts through a load-bearing stud and is larger than 1/3 of the stud width. The hole was actually 2 1’2” wide, in a 5 1/2” wide 2x6 stud.
Fortunately, our inspectors aren’t just trained to find problems: they’re also able to – at least in situations like this – provide solutions. Our staff asked the framing contractor to install a 2x4 on the inside edge of the damaged stud from floor to ceiling to create a supplemental load-bearing element: but it could have been worse.
The big no-no: do not damage engineered trusses or open-web joists. If this is done, we will require the builder to obtain detailed repair instructions from the truss/joist manufacturer, which can cause delays in construction.
Here’s the entire “notching and framing” section of NBC 2010, for those inclined to study such things.
9.23.5.1. Holes Drilled in Framing Members
1) Holes drilled in roof, floor or ceiling framing members shall be not larger than
one-quarter the depth of the member and shall be located not less than 50 mm from the edges, unless the depth of the member is increased by the size of the hole.
9.23.5.2. Notching of Framing Members
1) Floor, roof and ceiling framing members are permitted to be notched provided
the notch is located on the top of the member within half the joist depth from the edge of bearing and is not deeper than one-third the joist depth, unless the depth of the
member is increased by the size of the notch.
9.23.5.3. Wall Studs
1) Wall studs shall not be notched, drilled or otherwise damaged so that the
undamaged portion of the stud is less than two-thirds the depth of the stud if the
stud is loadbearing or 40 mm if the stud is non-loadbearing, unless the weakened studs are suitably reinforced.
9.23.5.4. Top Plates
1) Top plates in walls shall not be notched, drilled or otherwise weakened to
reduce the undamaged width to less than 50 mm unless the weakened plates are suitably reinforced.
9.23.5.5. Roof Trusses
1) Roof truss members shall not be notched, drilled or otherwise weakened unless
such notching or drilling is allowed for in the design of the truss.