Skip to content

If you’re thinking of a new build or a renovation where shingles are in the mix for the siding, here’s a bit of information you need to know.
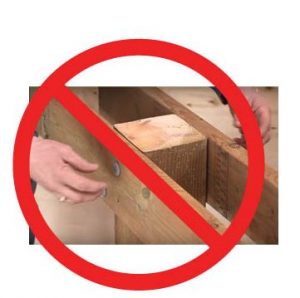
In this part of the world, National Building Code mandates a 1cm gap between the shingles and the housewrap of the exterior wall.

The intent of this gap (called a capillary break) is that there is sufficient room for water to travel down the housewrap, or vent via evaporation should water get behind the shingles. Failure to install shingles this way may result in moisture build-up between the shingles and the wall, resulting in early decay of the shingles or water penetration into the exterior wall.

There are several ways to achieve this capillary break. One way is to use a manufactured “shingle backer.” One variety looks like a really big pot scrubber – see the included image.

In all areas of Charlotte and southern York County, a shingle backer of some nature, such as this purpose-built material, is required.

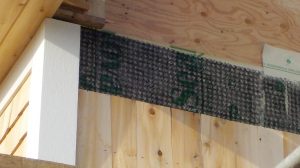
Another way is to line the wall with garden lattice before applying the shingles.
Questions? Give us a call at 466-7369.
Our inspection and planning department serves all the unincorporated areas between Lepreau up to the Hanwell Road north of Harvey, as well as the municipalities of St. George, Saint Andrews, McAdam and Harvey.

Here’s yet another post about decks, because decks seem to be one of those things where some improper construction takes place.

Today, we’re going to talk about beams (again.)

In a deck, the beam is the horizontal member that spans the posts (which are 6x6 in size, as we’ve pointed out before) anchored to a sonotube or screw pile for decks greater than 60cm in height, or decks attached to a building. The beams hold a lot of weight, and must be built to handle that. We have seen some situations where that load is supported on a pair of joists bolted to the side of a post. This is not good.

How not good?

Please do not build a deck using this as a "beam."

So not good one of our inspectors made a red-circle-with-line-through-it graphic.

The strength of a beam comes from having three or more pieces of wood nailed to each other (with splices ideally over supports). The load is spread across three members, which in turn should rest on top of the aforementioned column (which is 6x6 in size, not 4x4. You’d almost think that 4x4 posts aren’t Code-compliant, the way we keep mentioning that you have to use 6x6 posts.)

In the picture we show you, the load is carried by two bolts, and shared by two joists that cannot disperse loads to each other. If our building inspectors see something like this on a new deck build, it will make them very unhappy.

And we don’t want that.

We also don’t want decks falling apart. And neither do you.

Remember, if it’s new construction and attached to a house or business, a building permit is required, in part so we can make sure it’s built right.

Questions about permits, deck construction or any other project?
If you’re in an unincorporated area, Saint Andrews, Harvey, McAdam or St. George, call us at 466-7369 and ask for one of our building inspectors.


After extensive discussions in our office this morning, we have determined that the warm bright thing many of us saw throughout Saturday and for portions of Sunday was, in fact, a thing called “the Sun.” Apparently, sightings of this “sun” are common, and is associated with a number of activities, such as swatting mosquitoes, planting gardens and building decks.

We can’t help you with the mosquitoes or the garden, but we can help you with decks. Heck, we’ve got all sorts of deck-related tips.

Like the fact you should use 6x6 posts, not 4x4 posts.

And beams should rest on the top of those posts, not bolted to the sides.

Or that any new deck being attached to a house requires a building permit. Why? We want to make sure a deck attached to a house is supported on some form of below-frost foundation: sonotubes, helicoils or a frost wall.

This deck, built without a foundation, has suffered significant structural damage due to frost heaves.

We could quote Code at you, but instead, look at this picture. This is a picture of a deck, in winter. The yellow lines highlight how much the deck has lifted due to frost heaves. It is not uncommon to see frost heaves lift an improperly-built deck (on deck blocks) by six, eight inches or more during the winter, only to drop (maybe) in summer.

Repeat this cycle a few years, and the end result is a deck that is significantly weakened, putting its users at risk of injury.

We don’t want that. Neither do you.

So the bottom line: please don’t use deck blocks to build your deck if it’s attached to your house (or if it’s freestanding, and taller than 60cm off the ground.)

Questions? If you’re in our service area (St. George, Saint Andrews, McAdam, Harvey and all unincorporated areas from Lepreau to Hanwell) give us a call.

On the whole, screws are not permitted for any kind of structural construction.

In the last few weeks, our inspectors have noticed a few situations – mostly with do-it-yourself homeowners – where people have used screws rather than nails for structural work - that is, securing joists, roof rafters and the like.

There’s a huge difference between the two, and in most cases, it’s important to use nails for structural building (that is, assembling load-bearing walls), not screws.
Why?

Screws are amazing at securing one chunk of wood to another when the forces are in line with the screw. So they're pretty darn good at holding sheathing down onto a floor system, or roof truss. But they're not so good at holding things together when shear forces (those perpendicular to the line of the screw) are involved.
Nails, however, are best at securing one chunk of wood to another when the forces are perpendicular to the line of the nail.

In most cases, screws should not be used for any kind of structural construction.

Renovations are challenging projects: they’re frequently messy and full of surprises.

The building inspectors at the Southwest New Brunswick Service Commission want to help make sure one of those surprises isn’t a violation of the National Building Code of Canada.

Here’s a quick guide to how inspectors interpret Code when it comes to renovations.

Photo by Charles 🇵🇭 on Unsplash

First off, any new construction must meet the building code, but existing construction does not.

To put it in practical terms, a new bedroom addition on an existing house must have an egress window and a smoke alarm. If there’s an attached garage, wood stove, gas appliance, or oil furnace in the house, the bedroom must also have a carbon monoxide detector (but we can’t force installation of any other carbon monoxide alarms in the existing house.)

The more extensive the renovation, the more we will require from the build. Consider an older home where the owner wants to do what we call “a gut” of a home, that is, pull out all the old lath-and-plaster walls and insulation, removing everything on the interior right down to the studs. In such a case, we can require

  • Wall and attic insulation to Code
  • Wiring to Code
  • Vapour barrier to Code
  • Bathroom ventilation
  • House ventilation (installation of a heat-recovery ventilator if the furnace is not equipped to introduce outside air into the home.)

That last item is one that catches a few owners and builders every year. Here’s the basic point: if a home is being largely returned to bare studs, that gives space and opportunity to install ducts for an HRV.

As always, the best thing to do if you have a question is give us a call at 466-7369.

This week, we’re going to correct a common myth – and maybe put some cash back in your wallet in the process.

Many people believe that if you have an attached garage on a home that you must install fire-rated drywall between the garage and the house.

Regular 1/2 drywall is about $13 retail, while fire-rated 1/2 drywall is $22. For 5/8 drywall, the difference is $20 for regular, $30 for fire-rated.

The National Building Code of Canada (2010 edition, as used in this province) says otherwise: there is an exemption for garages attached to houses when that house is used for a residential occupancy. That’s a fancy way of saying that as long as people are living in the house, no fire separation is required.

Given that fire-rated drywall is more expensive than the regular drywall (almost double for 1/2 drywall, 66 per cent increase for 5/8" material), that might add up to a decent saving.

Now, if you have an attached garage there are some details you need to tend to, such as

  • Doors leading from the garage to living areas (including basements) must have an air-tight seal/.
  • Doors leading to living areas must automatically close.
  • The garage must be sealed from the rest of the house with vapour barrier.

The requirement for fire-rated drywall remains for garages attached to homes or buildings used for other purposes, like a dentist’s office, hairdressing salon and the like.

Some of our final inspections the last few weeks have raised a bit of a concern about exposed foam.

Here’s the thing about foam: it’s a combustible material, and if left uncovered presents a fire risk.

That’s why the National Building Code mandates that exposed foam in most building areas has to be covered. It’s one of the things our inspectors will check homes for during a final inspection.

This site-applied foam must be covered in order to pass a final inspection. This must be done to reduce fire risk, as foam is a flammable product.

Don’t get the wrong impression: foam, whether it’s site-applied or comes in pre-manufactured panels, is amazing stuff, and nothing else out there offers the same bang-for-the-buck in terms of insulation value. To put things in perspective, site-applied two-pound foam offers R6 per inch, compared to Fibreglass batts, which offer R3 per inch.

In addition to being a spectacular insulator, foam is also impervious to water and air, so it can’t trap moisture. Site applied foam also serves to seal homes from air leakage, which just bolsters its insulative properties and also means that in most cases, a vapour barrier (plastic) isn’t necessary.

Exposed foam can be covered in a number of ways, including the construction of a stud wall closed off with drywall, application of a stucco coat, or the use of specialized paint-like products intended for that purpose.

Hey folks ... we’re not the experts, but it almost (almost) seems like spring out there. That usually means our planning office starts receiving queries from homeowners thinking about projects and renovations.
Here’s a tidbit from our building inspectors: if you’re looking at doing a bedroom addition or renovation, be sure to tell your window supplier that the windows are meant for a bedroom. (“Egress” is the term used in the industry.)
The National Building Code mandates that bedroom windows have at least .35 square metres of area, with no dimension smaller than 38 cm, when the window is open. (For you imperial folks, that’s 542 square inches, and 15” minimum opening).

When closed, this window appears to offer 16 inches of space ...

Here you’ll see two pictures of the window at our office: the window occupies 16” when closed, but because it’s a casement window, narrows to a bit more than 12” when opened: this window would not be code-compliant as a new installation in a bedroom.
Why?
The idea is that in the event of a fire, someone in a bedroom may be trapped

... but when open, it offers only 12" of width.

by flames or smoke: a window of suitable dimension will give bedroom occupants a chance to bail out the window.
Quick note: if you’re expanding the size of the window as part of a renovation, obtain a building permit just so inspectors can make sure you’re using the right headers (lintels) for the wider opening to support the roof load. Questions? If you live in an unincorporated area from Hanwell Road to Lepreau, or you live in one of St. George, Saint Andrews, McAdam or Harvey, give us a call at 466-7369.
Happy building!

It’s almost (almost) spring, and that means the time that folks start thinking about summer projects like home renovations, additions, and other building projects.
One of the things our planning department likes to see (or requires, depending on the size of the project) is a plan.
That doesn’t mean you have to go out and spend a ton of dough on an architect to draft your dreams, but it does mean you should be able to provide a reasonable outline of the work you’re thinking of doing.
Here are two free (not trialware) software tools that may help in designing that bedroom addition, garage, or that camp by the lake.
In no particular order:

An image of floorplanner in use

1) Floorplanner (website: floorplanner.com): This is a web interface program that seems reasonably intuitive to use. (See image above).

2) Sweethome 3D (sweethome3d.com): This is a free-for-use program that works on Mac OS, Windows, as well as Linux. It’s been rigorously tested by one of our inspectors, who has used it to design both an unorthodox home and a simple cabin.

There are also a number of pay-to-use programs out there, if you’re interested in giving them a shot.

In the end, don’t be afraid to give our planning department a call. And remember: that project requires a permit – don’t build until you have one. For Saint Andrews, McAdam, Harvey, St. George and all unincorporated areas from Hanwell Road to Lepreau, permits can be obtained through our office.
Call 466-7369 for more information.

Hey folks: you (that is, homeowners and contractors) have told us that we need to do a better job of explaining when those who are building need to call for an inspection - and also what our inspectors are doing when we show up on site.

Here's a list of the kinds of inspections we do, and when to call. When we issue a permit, we'll indicate right on the permit when to call us - but this handout will also explain a bit more.

Here's an outline of when to call for inspections

Questions? As always, call our office.

Happy building!